This section discusses the user interface (UI) and main functionality.
When you launch the app you are bought to the main interface as shown in the figures below. The main UI consists of three tabs (from left to right): start, history and settings. When the app starts, it focusses on the start tab. The app offers a number of modes to record workouts -- for example, manual input which is a bit tedious and the GPS mode as shown in the figures. You can view your workout history by tapping on the history tab. In the setting tab, you can set your personal information, e.g., name, email, etc. We are going to introduce each of these three tabs in the following section.
You can record your work out in three ways: manual input, GPS or
automatic modes. This section describes how each method works.
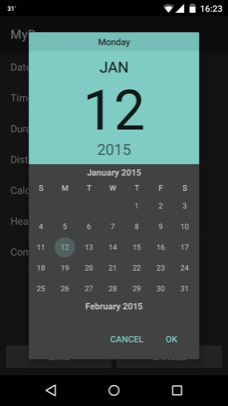
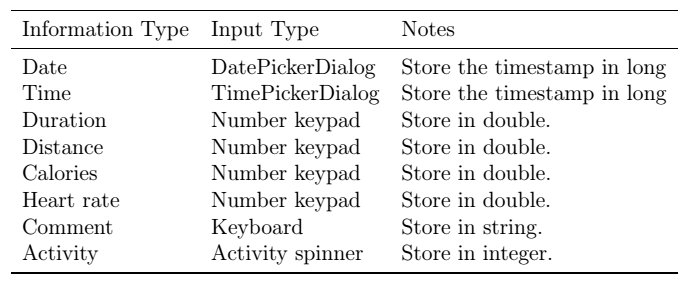
Manual entry is activated when you select “Manual Entry” for the “Input Type” using the start tab. You can specify the type of activity in “Activity Type” spinner. When you click “Start”, you will be brought to the manual input interface, where you can input the details of your workout. The table below shows the information type (e.g., heart rate), the type of widget used for data entry (e.g., TimePickerDialog) and short note on how the data could be stored (e.g., Store the timestamp in long) for data associated with a workout that the use can manually enter.
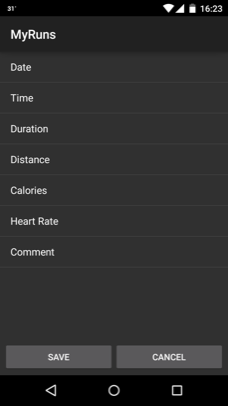
The corresponding details of exercise are listed in the following table.
When the user clicks on any exercise/workout entry, the app should show a
data entry dialog. When user taps save, the entry should be saved to the
database. More on the database later.
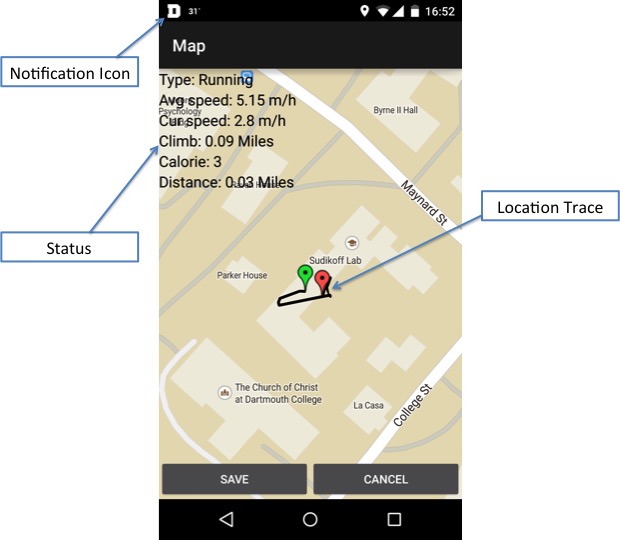
The GPS entry mode is when the user selects “GPS” for the “Input Type” on the start tab. You can specify the type of activity using the “Activity Type” spinner. When you click (it's more tapping and not clicking on a smartphone but you get my drift) “Start”, you will be brought to a map interface, where you can see your location trace and some information about your current activity. Also, a notification icon is shown in the notification area, indicating the app is tracking your location.
The automatic entry mode is when the user selects “Automatic” for the “Input
Type” using the start tab. It is similar to the “GPS” mode except the activity
type (i.e., walking, running) is automatically inferred using a classifier and
features computed from the accelerometer data. The real time activity inference
will be shown in the status area. The final activity type is determined as the
activity label (e.g., walking) that has been inferred more times than other
activity label over a defined period of time.
When “Sync” button is clicked, the workouts/exercise records should be send
to remote server and stored in the cloud.
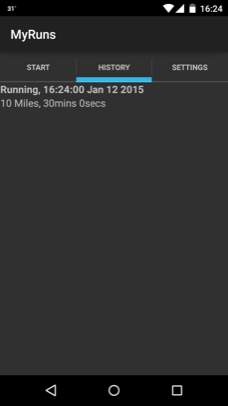
The History tab shows the list of all recorded workout entries. Each entry consists two lines: title and text. The title includes the activity type and time of the activity while text captures distance and activity duration.
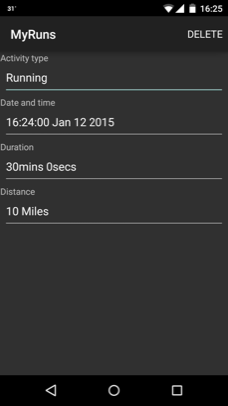
When the user clicks on an entry, assuming the entry was input manually, then the app shows an interface containing the status, as shown in the screen shot below. Otherwise the app opens the map interface to show the trace. When user clicks “DELETE” in the action bar, the entry should be removed from the history tab.
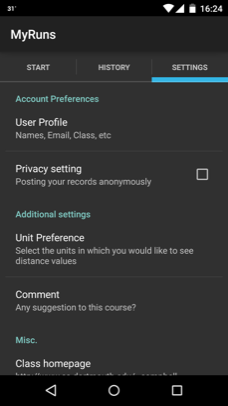
As discussed in the User Interface Walk-through section, you can set up the user profile (open a new activity), privacy setting (check box), unit preference (pop-up dialog with radio boxes) and comment (pop-up dialog with text box) in the "Settings Tab". All setting modifications should be saved automatically.
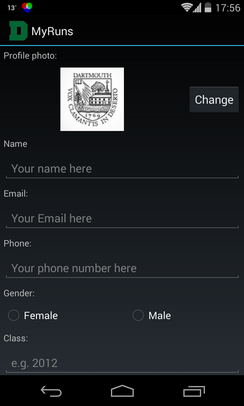
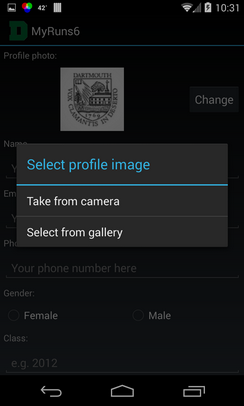
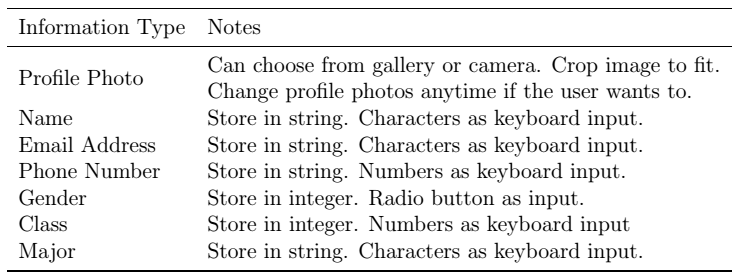
When the user clicks the “User Profile” a new view is presented, as shown in the screenshots above. The user should be able to input their photo, name, email, phone number, etc. When the user click the "Change" button, they can choose to take a picture using the camera or select one from the gallery (as shown in the middle figure). The interface should allow the user to take or get a picture. The following table shows detailed definitions of the user profile.